DEAREST Anchor Inspections - SlacklineUS Talk
Last Thursday, March 27th, 2025, I gave a talk on Anchor Inspection for SlacklineUS's Slack Talk series.
The talk went well, with about 30 people attending and a good question and answer period after. Unfortunately it was not able to be recorded, but to make it available to anyone who missed it I'm publishing my slides and lecture notes to make the information accessible. Because these were notes for a talk, they're not as polished as my usual writing. There's also a lot more I could say on these topics, but I had to fit into the time constraints. So feel free to send me questions or feedback. This is something I plan to develop more in the future. So without further ado, here's the talk.
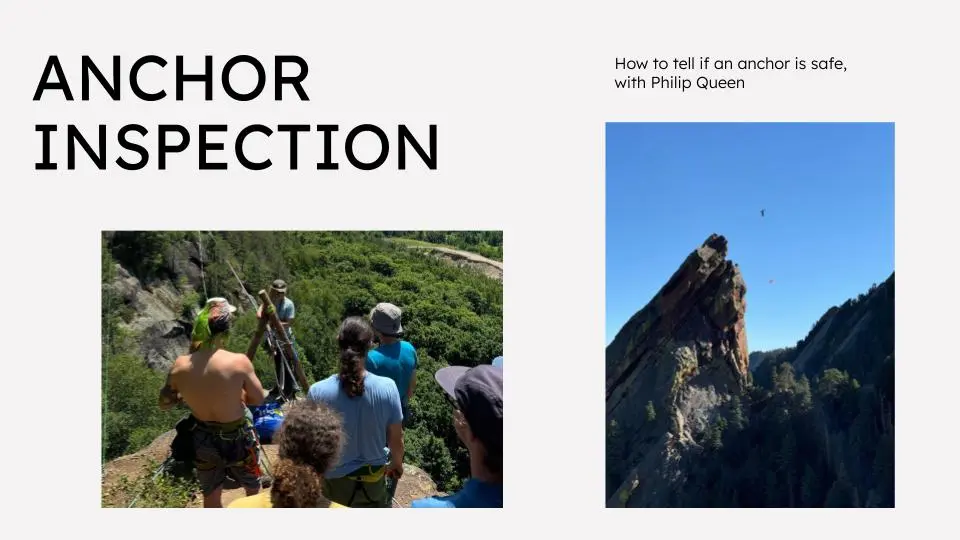
Hello and Welcome! Today I'm going to talk about how to tell if a highline anchor is safe. Obviously there are a lot of details to keep track of in a highline anchor, and those details are going to be different for every type of anchor. So instead of trying to cover every little detail, I'm going to discuss some general principles that will help you inspect highline anchors and build safe anchors on your own.
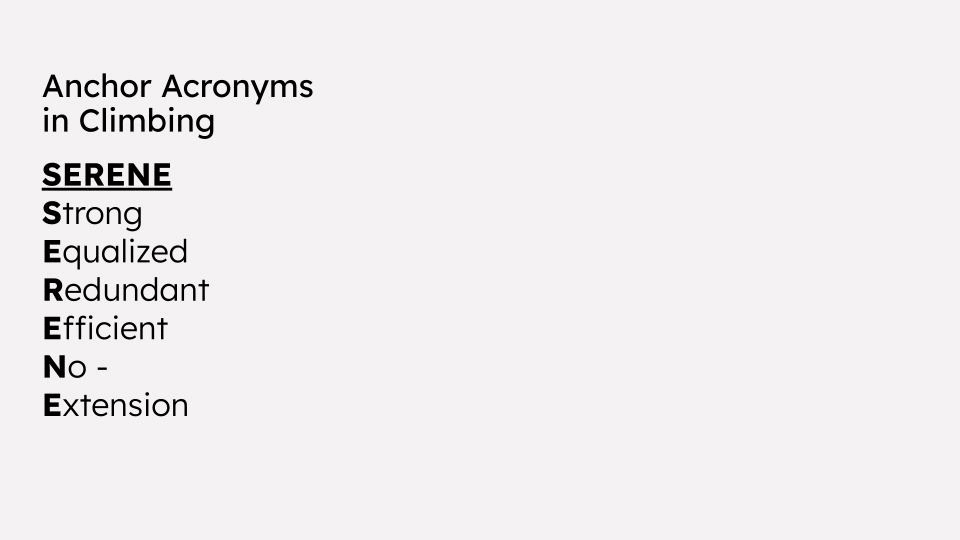
If you look up anchor building, most of what you'll find is about climbing anchors, and it won't be long until you run into what I call an "Anchor Acronym". These are mnemonic devices that provide a checklist to reference while building or inspecting anchors. One common anchor acronym is SERENE: strong, equalized, redundant, efficient, and no extension. These are principles every climbing anchor should follow, and they apply well to highline anchors too. You may notice that the acronym doesn't tell you how strong an anchor needs to be, what direction it should be equalized in, or what counts as redundant. It relies on you knowing the details for a specific anchor, but can help remind you of everything that needs to be checked. And what they lack in specificity, anchor acronyms make up for in generality. One acronym works for every anchor...
There are variations on the acronym though, for example SERENE-SA accounts for small angles. There's also SNARE, and EARNEST, and RENE, and SSS, and DRESS, and SAFER.
.webp)
Clearly there's a lot of options here. Why can't we decide on just one option? Well, at the risk of making matters worse, I'd like to introduce a new Anchor Acronym. But this new acronym will be specific to highline anchors.
Why do we need a highline specific anchor acronym? Don't the climbing ones work just as well? In my opinion, the climbing anchor acronyms are missing some keys pieces of safe highline anchors. I think there's two main reasons the climbing acronyms don't work.
.webp)
First, highlining is more dangerous than climbing. We have significantly higher forces than climbing. Our systems have more movement and more contact with potential abrasion surfaces, so our gear is much more likely to be damaged in normal use. Add to that the fact that the webbing we walk on is extremely fragile, and you can see that highliners should be much stricter about our anchors than climbers. But the other reason highlining needs its own acronym is that...
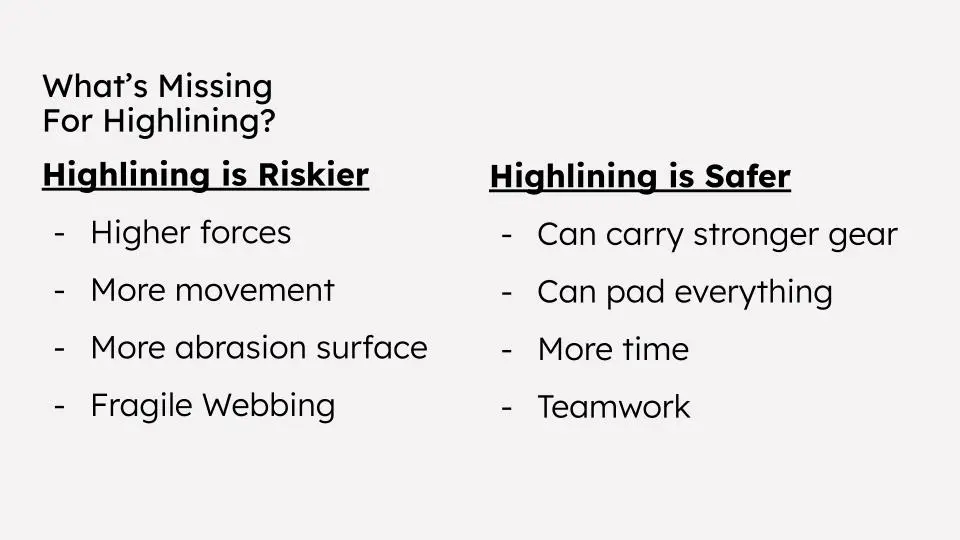
...Highlining is safer than climbing. We can carry much stronger and more abrasion resistant gear, and we're able to pad everything that might get abraded. We have more time to build our anchors, and never have to commit to them before they're safe. We also get to work with other people, giving us a chance for buddy checks and differing opinions.
With all of this working for us, we have the potential to be much safer than climbing even with the special risks of highlining. We need a new anchor acronym that plays to the strengths of highline rigging practices while covering our weaknesses. That's why I'm proposing...
.webp)
DEAREST. It stands for direction of load, equalized, abrasion mitigated, redundant, extension limiting, strong, and two sets of eyes. Let's go through piece by piece with examples to help make it clear.
.webp)
Direction of Load: What direction you're pulling on your anchor can make a huge difference. In the top photo here, you can see an anchor that's very wide (what looks like a middle leg is just loose tail). This can multiply the force each anchor point sees, which undoes some of the load sharing benefits from having multiple anchor points. It's best to keep the angles in your anchor under 90 degrees, and definitely under 120 degrees, which is the point where the force on each anchor isn't lowered by the load sharing.
On the bottom left, we see a nice 4 bolt anchor, but three of the bolts on the right side of the anchor and only one is on the left. This means the bolt on the left is seeing much more force than any one of the bolts on the right, again undoing some of the load sharing of our multi point anchor.
On the right, we see an anchor that's pointing in a different direction than the line. This is only possible with some kind of redirect, and the further the angle of the line is from the angle of the anchor, the more force that redirect will see. Also, as we get more and more deviation, the consequences of our redirect failing become more and more serious.
The direction of load also comes up on a smaller scale in our anchors. For example, is the shackle being loaded on the center of the pin instead of off on the side? Is the carabiner being triloaded?
.webp)
Equalized: Hand in hand with the direction of load is equalization. When we have multiple anchor points, or even multiple legs going to the same anchor point, we want them to be equalized. That is, we want each anchor point or each strand of our anchor to be sharing load with the other parts of the anchor. We don't want the situation in the graphic where one leg is taking all of the load and the other legs are loose. If we do have a failure, then 100% of the load will transfer onto the next leg, and we have a high chance of whatever broke the first leg also breaking the second. This kind of cascading failure is rare, but if it does happen it can cause your entire anchor to fail.
Instead of this, what we want is each part of the anchor sharing the load. If we have a 3 leg BFK, we want each leg (and each bolt) taking just 33% of the load. This will make each part of the anchor far less likely to fail on its own, making the whole anchor that much stronger.
When you're checking equalization, it's always important to check what direction your load is pulling in. Most highline anchors aren't self equalizing, so if you pull in a different direction than the anchor was built for it will no longer be equalized. So always double check where your anchor is pulling, and watch out for things like wind that can change which direction your anchor is loaded.
.webp)
Abrasion Mitigated: This is perhaps the biggest thing left out the climbing acronyms. Highlines are high tension, constantly moving, and are left rigged for hours, days, or even months at a time. These are all serious risk factors, and together they make abrasion the biggest danger for normal highlines.
The main way highliners mitigate abrasion is with padding. Thick, durable materials placed between the anchor and any potentially abrasive or sharp surface provides a layer of protection for the anchor gear that is supporting our lives. This padding is vital to an anchor. There is no soft good we use for anchor material that is so abrasion resistant that it doesn't need padding. So always make sure any soft goods like ropes, spansets, or whoopie slings do not directly touch rock, the ground, or even trees. Every contact point should be padded for every anchor.
In addition to padding, there are a few other things that can influence how abrasion mitigated an anchor is. Reducing tension is one of the biggest things you can do to decrease the risk of abrasion. That means proper equalization in anchor legs, adding more loaded strands of material to an anchor, and just reducing the total tension on the system will all help with abrasion. More abrasion resistant materials like thicker ropes and spansets will also help. Minimizing movement in the anchor is also a huge help, as movement greatly accelerates abrasion. Using a stabilizer bolt or propping the anchor up on a bag are some of the common ways of minimizing movement. Using an A frame can also completely distance your anchor from any potential abrasion, although the anchor still needs to be padded for a potential A frame failure.
The webbing is the least abrasion resistant part of the system. Not only is very fragile, its also one of the weakest parts of the system and one of the pieces under the most tension. For this reason its crucial to always have the webbing extended over the edge, with no risk of touching anything that could potentially abrade it. This applies to the backup webbing as well, as abrasion on the backup during a mainline failure could easily become fatal. The key takeaways here are ALWAYS pad your anchor and make sure your webbing is only over the edge of the cliff.
.webp)
Redundant: Any single piece of gear in your highline system should be able to fail while you're highlining without dropping you to the ground. This is the ideal of redundancy in highline rigging, and with some notable exceptions like the leash and leashring, every highline anchor should be able to live up to this ideal. At its simplest, this is achieved by having two of everything in the system. A main and a backup webbing, multiple bolts, multiple materials in the anchor. The bottom picture shows an anchor built like this. There are times where we get clever and don't use two of everything. For example in a BFK like the top picture, a single rope was made redundant by separating each leg with a knot at the masterpoint. Even if one part of the rope fails, the other legs will be unaffected.
I think of redundancy as a spectrum - it's not "is this redundant?" but "how redundant is this?". Of course some things just aren't redundant, but some things are technically redundant while still being not as redundant as they should be. A BFK with two legs is less redundant than a BFK with three legs. The three leg BFK is still redundant if one leg fails while the two leg BFK isn't. I call this being "fail safe", but its a topic for another time.
Another example of something that's less redundant than it should be is two spansets running across the same sharp edge. It's technically redundant, but wouldn't it be better if the second spanset wasn't running over the sharp edge? When I'm evaluating redundancy I ask myself two questions: "what if this failed?" and "what would cause it to fail?" If the redundancy is undone by the same failure mode, then you should start looking for better redundancy. A lot of people abuse this second question to mean something like "this is never going to fail, so it doesn't need redundancy". It generally sounds like "yeah, but how are we ever going to make that fail?" Having seen enough incident reports over the years, I can tell anything can fail, for all sorts of reasons I never would have expected. So back your stuff up, and never settle for an anchor that isn't redundant enough.
.webp)
Extension Limiting: Extension happens when something fails on a highline. The highline is a giant spring, and as soon as theres slack in the system it will try to remove it, typically by shooting quickly away from where the failure was. If there's no slack in the backup for the failed piece, the highline can't move. But if there's slack, the highline will move violently and risk shock loading and abrading the anchor.
Shockloading happens when an untensioned material is loaded with a significant force very quickly. Because there is little time to stretch, all of the energy is spread out over very little time, which causes very high forces. While shock loading can happen to any material, it is worst in low stretch materials. Higher stretch materials can spread the energy from the impact over time, which is why lead falls in rock climbing don't generate shockloads. If you fell that much on a static rope, the force of the same fall would be much higher. The best way to prevent shockloading is to already have your backup under tension. That way the webbing doesn't have time to accelerate, and is loaded immediately.
The other risk of extension is from abrasion. As the anchor extends, it can move across rough surfaces or into sharp obstacles. At the same time it can move off of edge pro and the edge pro can be pulled from it. This means extension has a high chance of causing tensioned, moving, unpadded materials to rub against sharp or abrasive surfaces. But just like with shock loading, the solution is to limit the extension that the anchor will see. If possible, an anchor should have no extension during a failure of any one part.
.webp)
Strong: This one is simple, a highline anchor should be strong. But how strong? The ISA minimum for anchor gear like weblocks and connectors to be certified is 48 kN. This is a great minimum, although I generally look for 60 kN if it's possible with the available gear. But where do these numbers come from? For the ISA's 48 kN, it's 12 * 4. 12 kN is the maximum force allowed in the highline system, and they've added a safety factor. 12 kN is high for most highlines, as my normal rule of thumb for max expected force on a line is 7 kN. However, big lines can easily reach that and freestyle lines have been known to get up to 10 kN, and the ISA wants to cover those use cases. Why do I say 60 kN? Because that's the strength of a normal 3 bolt BFK with good (20 kN) rope. If something is weaker than a 3 bolt BFK, I like to include that in my decision making: "hey, this is weaker than what I normally highline on."
But why so much more than the expected force? Why 60 kN if we expect 7? One reason is to have a safety factor. If you're routinely hitting 7 kN on something rated to 8 kN, eventually some little thing will change and you'll break it. And we have safety factors precisely to cover all of these little things: a bad angle, an unscrewed pin on a shackle, uv damage, abrasion, fatigue from cyclic loading... I could go on. A safety factor lets a lot of these little issues add up without something catastrophic happening. We want to be able to lose some percentage of the strength many times over and still be safe, especially because we tend to use the same gear year after year. The other reason for safety factors is big failures. If I tie a 3 bolt BFK with 3 single strands of rope the whole thing will be 30 kN. I'm never going to hit 30 kN, but what if one leg breaks, or two? Compare that to a standard two strand per leg BFK that's 60 kN. When it's lost one leg its still stronger than the single strand version, and when it's lost two it's as strong as the single leg that's lost one strand. So I recommend aiming for 60 kN anchors, and using 48 as a minimum.
It's also worth mentioning here to use strong anchor points. Compare the giant tree in the picture vs the boulder that moved. There's a lot that goes into evaluating anchor points that I don't have time to cover here, but it is something you should remember to think about when checking the strength of your anchor.
.webp)
Two Sets of Eyes: This is the highliner classic. It's a buddy check, just like you would get while tying in, but for your anchor. Despite everything I said before, probably the biggest risk in highlining is from human error. We've seen it far too often with leashes, but it applies to anchors and rigging as well. The highline system that competent riggers are using these days is full of redundancies, safety factors, and solid principles. It's extremely robust to bad decisions. But there are still simple errors that can throw everything off, like forgetting to tie off a weblock, forgetting to connect the backup, or not checking if the pin is in. Even the most experienced people can make mistakes like this. All sorts of factors cloud our judgment like stress, being tired, being too hot or cold, being in a rush... The best way to protect against these problems is by having someone else check your work.
The two photos show some subtle issues with anchors. Neither was a full failure, but both are things that should have failed an inspection. So if you're building an anchor, have someone else check it. And if you didn't build an anchor, check it yourself! Even if someone else has, you can be the second (or third or fourth) set of eyes on it. It's essentially a form of redundancy for human errors.
Now we've covered all the parts of a DEAREST anchor. When building or inspecting an anchor, we want to make sure it has a good direction of load on each piece, is equalized and abrasion mitigated, is redundant, limits extension, is strong, and has two sets of eyes on it. These are principles every highline anchor should follow, and we can use it as a checklist to make sure we consider the most important things for the safety of our anchors. More or less, we want to rig like we are putting our dearest friends and loved ones on the line - because often enough, we are.